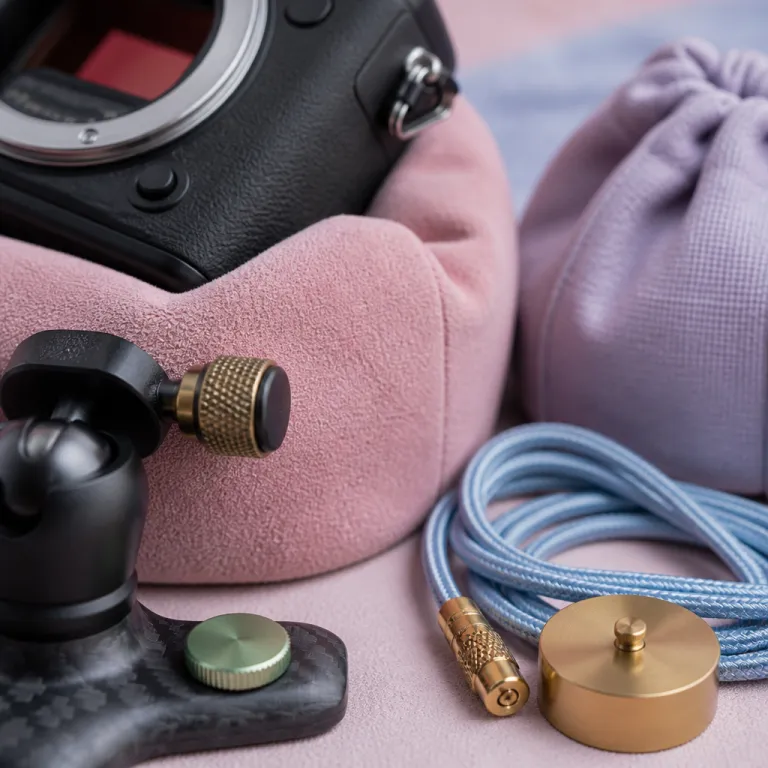
Why steady hands matter in luxury digital artistry
Luxury artwork lovers expect every photo of a masterpiece to feel flawless. When you study how to fix shaky hands in photography for gallery work, you quickly see how a tiny camera tremor can destroy the aura of a rare canvas or sculpture. A single blurred image can flatten texture, mute light, and reduce the emotional impact of even the best curated collection.
In high end digital artistry, the camera becomes a precision instrument rather than a casual tool. The way you hold the camera, the way your hands respond to the shutter, and the way the lens renders images all influence whether you achieve tack sharp shots or merely acceptable softness. Collectors and curators judge image quality instinctively, so mastering image stabilization and rock solid handholding techniques will help you present each perfect scene with authority.
Every luxury piece, from a polished bronze to a delicate cyanotype, deserves a photo that respects its material truth. When unsteady hands introduce blur, the viewer loses access to micro details that define value, such as craquelure, brushwork, or the grain of rare wood in low light. Understanding how shutter speed, focal length, and camera settings interact with your physical stability is the first step to create images that honor the artwork rather than merely record it.
Body mechanics and grip: training your hands for stability
Before you adjust a single shutter speed, you must train your body to hold the camera steady. Stand with your feet about shoulder width apart, keep one leg slightly forward, and tuck your elbows gently into your torso to reduce camera movement from your hands. This stance will help your camera stay aligned with the artwork and prevent subtle shake that ruins otherwise perfect photos.
Use your left hand to cradle the camera lens from below, not from the side, because this position supports the weight of heavier lenses often used in luxury photography. Your right hand should form a relaxed but firm grip around the camera body, allowing your index finger to press the shutter without a sudden jab that sends vibrations through the system. When you hold the camera in this way, you can work at slightly lower shutter speeds while still capturing sharp shots of paintings, sculptures, or refined digital prints.
Breathing control matters as much as grip when you photograph in low light galleries. Exhale slowly, pause briefly at the end of the breath, then press the shutter with a gentle squeeze rather than a quick tap to reduce camera movement from your hands. This simple rhythm will help you create images with higher image quality, especially when you cannot use a tripod or increase shutter speed due to strict museum lighting rules.
For luxury portraiture of artists or collectors, the same principles apply with even greater sensitivity. When you work at eye level for refined headshots, as explored in the guide on the art of the eye level headshot in luxury digital portraiture, any shake in your hands can soften the eyes and weaken the emotional connection. Training your body mechanics ensures that every photo feels intentional, controlled, and worthy of the subject’s status.
Illustration idea: Include a simple side-on diagram showing the recommended stance: feet offset, elbows tucked, camera close to the face. A second sketch can highlight the correct underhand support of the lens versus a less stable side grip. A third small before/after crop could show a signature on a painting at 1/20 s with visible blur beside the same detail at 1/80 s with stabilization enabled, clearly demonstrating the benefit of proper technique.
Technical mastery: shutter speeds, focal length, and stabilization
Once your physical technique is reliable, the next step in managing shaky hands is to command your camera settings. The classic rule states that your minimum shutter speed should match the reciprocal of your focal length, so at 100 millimetres you aim for at least 1/100 second to keep the camera steady. With modern image stabilization in both camera bodies and lenses, you can sometimes use a slower shutter while still avoiding visible camera shake.
Luxury artwork often lives in low light environments where you cannot simply increase shutter speed without raising noise. In these situations, image stabilization technology will help you reduce camera movement, but you must still respect the limits of your hands and the weight of your camera lens. When you choose a lower shutter value, test several images and zoom in on fine details to judge whether the images remain acceptably sharp for high end printing or digital display.
Shutter speeds interact with focal length in subtle ways when you photograph large installations or intimate miniatures. A wide lens at 24 millimetres forgives more shake than a long lens at 200 millimetres, so you adjust your shutter speed accordingly to protect image quality. If your camera offers multiple image stabilization modes, select the one designed for static subjects, because this mode will help you create the best photo of a still artwork without compensating for panning or motion.
Digital artistry around iconic works, such as interpretations of the barking dog of Keith Haring as a luxury art icon, demands technical precision. When you translate such pieces into high resolution images, any blur from shaky hands undermines the graphic power and line clarity that define their value. Mastering the relationship between shutter, focal length, and stabilization ensures your photos respect both the artwork and its market position.
Tripods, supports, and low light strategies in refined spaces
Even with perfect technique, there are moments when your hands alone cannot keep the camera steady enough. In dim salons, private collections, or candlelit installations, a solid tripod becomes your most reliable ally against camera shake and soft images. Choose a tripod that supports the full weight of your camera and lenses while remaining discreet enough for elegant interiors.
When a full tripod is impractical, consider compact supports that still reduce camera movement from your hands. A monopod, tabletop tripod, or even a stable ledge can help you work at a slower shutter without sacrificing image quality in low light rooms. Resting the camera on a railing or display case, with a soft cloth to protect surfaces, will help you create sharp shots of delicate objects without drawing attention.
Luxury venues often restrict flash, so you must balance shutter speed, aperture, and ISO carefully. Open the lens aperture as wide as the composition allows, then increase shutter speed until camera shake disappears while keeping ISO at a level that preserves fine tonal gradations in your images. When you cannot raise shutter speeds further, lean against a wall, brace your elbows, and time your breathing to reduce camera movement from your hands.
For mixed media works such as refined cyanotype textiles, the interplay of light and pigment demands particular care. Techniques discussed in resources on cyanotype for fabric as a refined medium for luxury textile art show how subtle tonal shifts define the artwork’s character. To respect these nuances, use a tripod whenever possible, combine image stabilization with careful camera settings, and avoid any slower shutter choice that risks blurring the delicate patterns.
From capture to refinement: photo editing for luxury artwork images
Even with excellent control of shaky hands, some photos will show minor softness that you must address in photo editing. High end collectors expect every image to feel crisp, so your workflow should include careful sharpening that enhances edges without creating halos or noise. Start with the best possible capture, then use editing only to refine, never to rescue fundamentally blurred images.
Modern software offers tools that analyze each image and apply adaptive sharpening based on subject detail. When you work on luxury artwork photography, zoom to 100 percent and inspect brushstrokes, fabric weaves, or metal textures to judge whether the image quality meets gallery standards. Subtle global sharpening combined with local adjustments on key areas will help you create photos that feel both natural and precise.
Noise reduction becomes critical when you shoot in low light with higher ISO to maintain adequate shutter speeds. Apply noise reduction first, then sharpen, because this order preserves more authentic detail in your images while still compensating for the effects of camera shake. If an image remains soft after careful editing, accept that it cannot represent the artwork in a catalogue or online viewing room aimed at serious buyers.
For digital artistry that blends photography with illustration or 3D rendering, editing choices carry even more weight. When you integrate photographed elements into complex compositions, any blur from shaky hands will clash with digitally sharp components and break the illusion of a unified perfect scene. Maintaining consistent sharpness across all source photos ensures your final images project the level of craftsmanship that luxury audiences expect.
Practical checklists: camera settings and habits that will help
Translating theory into consistent practice requires simple habits that you repeat for every session. Before you start, check that image stabilization is enabled on both the camera and the lens if available, then confirm that your chosen shutter speed suits the focal length and the level of camera shake you can realistically control. This quick ritual will help you avoid preventable softness in your photos of valuable works.
Adopt a baseline configuration for low light interiors where luxury artwork often resides. For example, set aperture around f/4 on many lenses, use Auto ISO with a sensible ceiling, and choose a minimum shutter speed that matches or exceeds your focal length to keep the camera steady in your hands. When the light drops further, consciously decide whether to increase shutter speed, accept a lower shutter, or reach for a tripod rather than drifting into accidental blur.
During the shoot, review images frequently at high magnification instead of trusting the small preview. Examine fine lines, signatures, and texture to confirm that your shutter speeds, camera settings, and stabilization choices are delivering truly sharp shots rather than almost sharp impressions. If you notice softness, adjust immediately by increasing shutter, changing focal length, or altering your stance to reduce camera movement from your hands.
Over time, these habits become second nature and transform how you approach camera shake in luxury contexts. You stop thinking about the mechanics of the camera and focus instead on composition, narrative, and the emotional resonance of each photo. That shift from technical anxiety to creative control is where luxury digital artistry truly begins to flourish.
Quick-start handheld checklist (with stabilization): enable in-body or in-lens stabilization; set aperture between f/2.8 and f/5.6; choose a minimum shutter speed close to 1/focal length; use Auto ISO with a ceiling that still preserves tonal detail; adopt a stable stance with elbows tucked; review a test frame at 100% before committing to a full series.
Key statistics on camera shake and image sharpness
- Tests by major camera manufacturers have shown that optical and sensor based image stabilization can provide between three and eight stops of compensation, meaning photographers can use shutter speeds up to roughly 100 times slower than the traditional focal length rule while still maintaining sharp images in many situations (see, for example, Canon’s RF lens IS specifications, Nikon’s VR technology notes, and Sony’s Alpha in-body stabilization documentation).
- Laboratory studies on hand held shooting indicate that around two thirds of blurred photos taken by enthusiasts in museum environments are caused by camera shake rather than focus errors, largely due to low light and restricted tripod use (summarized in imaging industry surveys and test reports from DxOMark and Imaging Resource on low light performance and motion blur).
- Field tests comparing tripod mounted and hand held images show that using a stable support can improve measured image sharpness by roughly 20–30 percent at slower shutter speeds, especially with longer focal lengths above 100 millimetres (results discussed in comparative reviews by DPReview and LensRentals that measure resolution charts with and without support).
- Analyses of online art marketplace listings suggest that artworks accompanied by high resolution, sharp photos receive noticeably higher engagement, with some platforms reporting around 15–20 percent more inquiries for listings with professionally photographed images (figures cited in market insights and seller reports from Artsy and Saatchi Art on image quality and buyer behavior).
FAQ about fixing shaky hands in luxury artwork photography
How can I stabilize my hands without a tripod in a gallery ?
Use a solid stance with feet apart, tuck your elbows into your body, and hold the camera lens from below while gently squeezing the shutter during a brief pause in your breathing. Whenever possible, lean against a wall or display case to add another point of contact and reduce camera movement. Combine these techniques with a slightly faster shutter speed and image stabilization to keep the camera steady.
What is the safest shutter speed for hand held artwork photos ?
A practical starting point is to match your shutter speed to the reciprocal of your focal length, such as 1/60 second for a 50 millimetre lens. If your camera or lens offers image stabilization, you can often use a slower shutter, but always test by zooming into fine details on the image. In very low light, consider raising ISO or using a support rather than relying solely on your hands.
Should I always use image stabilization for artwork photography ?
Image stabilization is extremely helpful for hand held shots of static artworks, especially in dim interiors. Leave it enabled when you shoot without a tripod, but consider turning it off on some systems when the camera is firmly tripod mounted, as certain stabilization mechanisms can introduce micro blur if they search for movement that is not present. Always check your camera manual and run simple tests with your own equipment.
Can photo editing fully repair blur from shaky hands ?
Photo editing can improve the perceived sharpness of slightly soft images through careful sharpening and contrast adjustments, but it cannot fully rescue photos that suffer from strong camera shake. For luxury artwork, where buyers scrutinize details, you should treat editing as refinement rather than repair. Aim for technically sharp captures first, then use software only to polish.
What equipment upgrades help most with shaky hands issues ?
Cameras and lenses with advanced image stabilization provide the most direct benefit, especially when combined with bright lenses that allow faster shutter speeds. A sturdy but portable tripod or monopod also dramatically reduces the impact of shaky hands in low light spaces. Beyond gear, investing time in practicing your grip, stance, and breathing will often yield improvements equal to expensive hardware.
