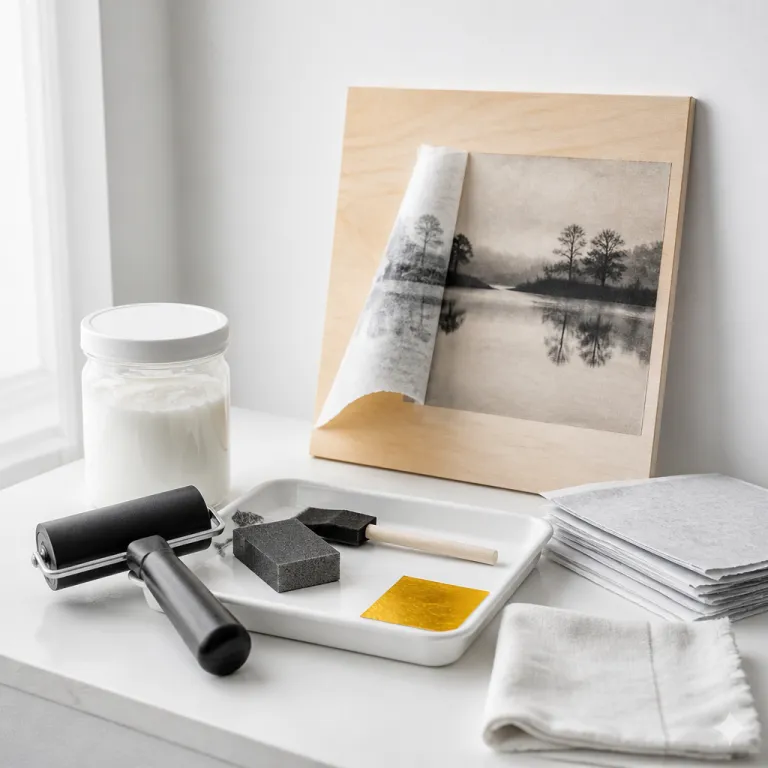
Why transferring a picture to wood elevates luxury artwork
Transferring a cherished photo to wood creates a tactile depth that canvas rarely matches. When you transfer a finely curated image onto a carefully selected piece of wood, the grain subtly reframes the subject and turns a simple photo into a collectible object. This process lets luxury collectors commission bespoke photo transfers that sit comfortably beside sculpture, design furniture, and museum-quality prints.
For a luxury interior, the way the transfer medium bonds the paper to the wood surface matters as much as the original photograph. A high-grade gel medium or a professional Mod Podge photo formula allows the image to sink into the fibres, so the final wood photo feels integrated rather than simply glued on top. When the coating dries clear, the viewer reads both the image and the natural pattern of the wood slice in a single, harmonious visual field.
Collectors who appreciate craftsmanship often prefer a photo transfer on wood over a standard framed print. The technique to transfer a photo to wood introduces subtle imperfections that signal the hand of the maker and elevate the work beyond mass-produced décor. Used thoughtfully, photo transfers on wood can turn family portraits, fashion editorials, or archival photos into heirloom-grade artwork that rewards close, slow looking.
Choosing the right materials for a refined photo transfer on wood
Every luxury-level transfer picture to wood project begins with materials that respect the image. Start with a kiln-dried piece of wood that is at least 2 cm thick, since a thicker piece of wood resists warping and feels substantial in the hand. Sand the wood surface progressively with fine grits—typically 120, 180, then 220 grit—until it feels almost like satin, because any scratch will telegraph through the paper and the final photo on wood.
The choice of paper and printer is equally critical for high-end work. For the classic technique, you need a laser printer because the toner bonds differently than inkjet pigments and withstands the water and rubbing needed to remove paper fibres. If you do not own a laser printer, many collectors quietly rely on professional print labs or even order preprinted sheets from curated online storefronts that specialise in photo transfers for artists.
For the medium itself, serious makers usually compare Mod Podge, a dedicated transfer medium, and an artist-grade gel medium. Mod Podge in its photo transfer formulation is an accessible product, while a matte acrylic gel medium from a fine art brand offers more control and a finish that truly dries clear. Luxury clients often request tests on small wood slices first, so they can read how different gels, Mod Podge products, and paper types interact with their chosen photos on wood before committing to a large-scale commission.
For more ideas on how such bespoke pieces can complement portraiture in a refined setting, you can explore this guide on inspirational coloring pages as an art form, which pairs well with custom wood photo installations.
Step by step process to transfer a picture to wood with gallery level results
Once your materials are ready, the process to transfer a picture to wood with a luxury finish follows a precise rhythm. First, print your chosen photo on standard copy paper using a laser printer at 300 dpi or higher, then trim the paper close to the image while leaving a small margin for handling. Apply an even but generous layer of transfer medium or Mod Podge directly onto the wood surface with a soft brush, making sure the coating is thick enough to stay wet yet thin enough to avoid ridges.
Next, place the printed image face down onto the coated wood and work from the centre outward. Use a soft brayer or a silicone spatula to press the paper into the medium, expelling air bubbles that could later disrupt the photo transfer and create unwanted voids. Wipe away any excess gel medium that squeezes out at the edges, then leave the work undisturbed for at least eight hours at room temperature (around 20–22 °C) in a well-ventilated, dust-free space so the product cures and the bond between paper and wood slice stabilises.
When the medium has set, you can begin to remove paper fibres with patience and water. Lightly dampen the back of the paper with a sponge, wait a minute, then gently rub in small circles with your fingertips until the first layer of paper rolls away and reveals the transferred photo embedded in the wood. This step may require several passes as the surface dries clear, and the key to great results is to stop rubbing before you abrade the toner itself and damage the image.
For collectors interested in national symbols or heraldic motifs, this meticulous method pairs beautifully with projects such as the Monaco flag coloring experience translated into wood, where saturated reds and whites gain new depth from the grain beneath.
Advanced techniques for luxury finishes on photos transferred to wood
Once you master the basic transfer picture to wood technique, refinement lies in the finishing. Many luxury artisans seal their photo transfers with multiple coats of archival varnish or a satin gel medium, sanding lightly between layers with 320–400 grit paper to achieve a surface that feels like lacquered stone. This approach protects the wood photo from humidity and ultraviolet light while keeping the tactile memory of the grain just beneath the clear skin of the coating.
For black and white images, a thin wash of diluted acrylic or water-based stain over the exposed wood can create a subtle halo around the transfer. By toning the piece of wood in warm grey or cool umber, you visually link the paper image and the surrounding wood surface, so the work reads as a single, intentional object rather than a collage. Some ateliers even inlay metal leaf into carved recesses around the photo on wood, turning simple photo transfers into mixed media panels that sit comfortably beside bronze or marble.
Colour photographs demand different care, especially when the original photo contains skin tones or luxury products such as watches and jewellery. In these cases, a gloss gel medium or a high-clarity Mod Podge photo formula that truly dries clear will keep colours saturated and prevent the slight milkiness that can appear with cheaper gels. When clients request multiple transfers on wood for a series, artisans often create test strips on offcuts to compare how each transfer medium, varnish, and paper combination affects the final image before committing to the main work.
Alternative methods: tattoo paper, direct printing, and hybrid workflows
Not every luxury project relies on the classic gel medium method to transfer a photo to wood. Some studios use high-quality tattoo paper designed for temporary skin art, because this material can also carry an image onto a sealed wood surface with remarkable clarity. The process is easy to control, since you apply the tattoo paper to the wood, activate it with water, then peel away the backing to leave a thin film of image that requires minimal effort to remove paper residue.
Another option is direct printing onto wood with a flatbed printer, which some boutique labs offer for large-format commissions. While this bypasses the traditional transfer-to-wood ritual, it allows for ultra-sharp photo transfers and precise colour management, especially when working from high-resolution digital files. Many luxury collectors commission a hybrid workflow, where a laser printer and transfer medium are used for intimate, hand-finished pieces, while large-scale installations rely on direct printing followed by hand-applied glazes and varnishes.
Whichever route you choose, the key is to respect both the image and the material. A carefully planned transfer photo project considers how the wood grain will intersect with faces, jewellery, or architectural lines, so the natural pattern supports rather than distracts from the subject. When artisans share detailed instructions with clients, including how the product behaves, how the surface dries clear, and how to care for photos on wood over time, they build trust and reinforce the sense that each work is a long-term investment rather than a passing décor trend.
Curating and displaying wood photo artworks in a luxury collection
How you display a transfer picture to wood piece determines whether it feels like a craft object or a serious artwork. Mounting a wood slice or a rectangular panel on a floating frame with a deep shadow gap instantly signals that the photo transfer belongs in the same visual conversation as paintings and limited edition prints. For large-scale interiors, grouping several transfers on wood in a grid or salon-style arrangement can create a narrative wall that feels both intimate and architecturally strong.
Curators often pair wood photo works with textiles, ceramics, or sculptural lighting to emphasise their materiality. A matte-finished transfer photo with a subtle gel medium sheen sits beautifully beside hand-knotted rugs and patinated metals, especially when the wood surface echoes other natural elements in the room. When planning such ensembles, many collectors consult resources on how to curate portraits and personal imagery, such as this guide to elevated senior portrait curation for luxury art lovers, then adapt those principles to the specific language of photo transfers on wood.
Lighting is the final, often underestimated, step in presenting these works. A raking beam can dramatise the texture of the piece of wood, while a softer, diffused wash keeps attention on the image itself and the way the medium dries clear across the surface. By adjusting angles so that reflections skim rather than obscure the photo, you allow viewers to read every nuance of the transfer, from the finest paper fibre remnants to the quiet rhythm of the grain beneath.
Key statistics and market insights on photo transfers to wood
- According to a report by Grand View Research, the global wall décor market surpassed 50 billion dollars in value, with personalised photo products such as photo transfers on wood representing one of the fastest growing segments (Grand View Research, “Wall Decor Market Size, Share & Trends,” 2022, report summary).
- Industry surveys from professional print labs indicate that requests for laser-printer-based transfer photo services have increased by more than 20 percent over the last five years, as clients seek tactile alternatives to standard canvas prints (aggregated internal client reports from boutique labs frequently cite double-digit annual growth, though figures are not publicly audited).
- Data from major online marketplaces show that searches related to transfer picture to wood and photo wood products have grown at double-digit annual rates, reflecting a strong appetite for custom, material-rich artwork (trend summaries from marketplace seller dashboards and category reports).
- Conservation specialists report that well-sealed wood photo pieces, finished with archival gel medium and varnish, can maintain colour stability for several decades under controlled lighting and humidity conditions (conclusions drawn from preventive conservation guidelines used in museum and gallery practice).
- Interior designers polled by design magazines consistently rank natural materials such as wood among the top three substrates for luxury artwork, especially when combined with personalised imagery and hand-finished details (editorial surveys and annual trend issues from high-end design publications).
FAQ: luxury level picture transfers on wood
What type of wood is best for high end photo transfers ?
For luxury projects, choose stable hardwoods such as birch, maple, or oak, which offer a smooth wood surface and resist warping over time. Panels made from Baltic birch plywood are popular because their fine grain supports detailed image transfers and their layered construction stays flat. Always select pieces with minimal knots in the area where the photo will sit, unless you intentionally want the grain to interrupt the image.
Why is a laser printer recommended for transferring photos to wood ?
A laser printer uses toner, which is a plastic-based powder that fuses to the paper and behaves differently from liquid inkjet pigments. During the transfer process, the gel medium or Mod Podge softens the toner and pulls it into the coating while you later remove paper fibres with water. Inkjet prints tend to bleed or fade when exposed to moisture, so they rarely survive the repeated rubbing needed for a clean, sharp transfer.
How do I prevent cloudiness so the finish dries clear ?
Cloudiness usually comes from applying the transfer medium or gel medium too thickly or from using low-quality products that never fully cure. For a finish that truly dries clear, apply several thin coats rather than one heavy layer, and allow generous drying time between applications. Using professional-grade acrylic mediums, following the manufacturer’s temperature guidelines, and working in a ventilated, moderate environment also helps maintain clarity.
Can I use tattoo paper for luxury artwork, or is it only for crafts ?
High-quality tattoo paper can absolutely be used in luxury contexts when handled with care and sealed properly. It creates a very thin image layer on the wood, which is ideal for projects where you want minimal texture and crisp detail. The key is to apply an archival varnish or clear gel over the transfer so the work gains the durability and visual depth expected in a high-end collection.
How should I care for wood photo artworks in a private collection ?
Keep photo transfers on wood away from direct sunlight, strong heat sources, and areas with high humidity such as bathrooms. Dust the surface gently with a soft, dry cloth, avoiding household cleaners that could react with the gel medium or varnish. When properly sealed and displayed in stable conditions, these works can remain vibrant and structurally sound for many years.
